使用 nexus 搭建 npm 私服
这里怎么去搭建 nexus 就不介绍了,在 nexus 设置模块中。
创建 Repositories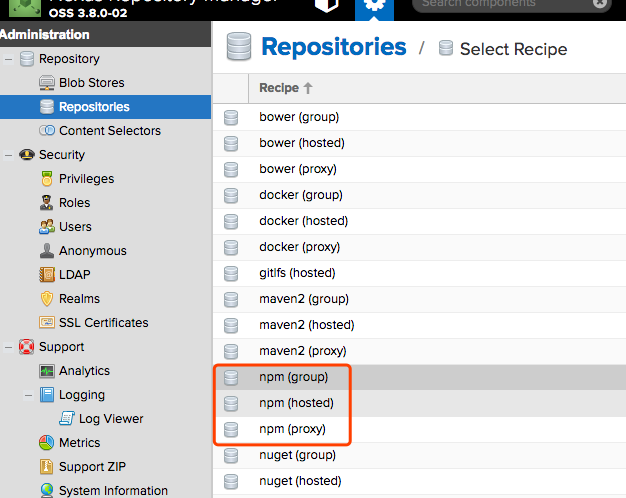
- 1: npm (proxy) 代理仓库
- 2: npm (hosted) 是私有仓库
- 3: npm (group) 是组合前面两个
创建代理仓库
创建 npm (hosted) 仓库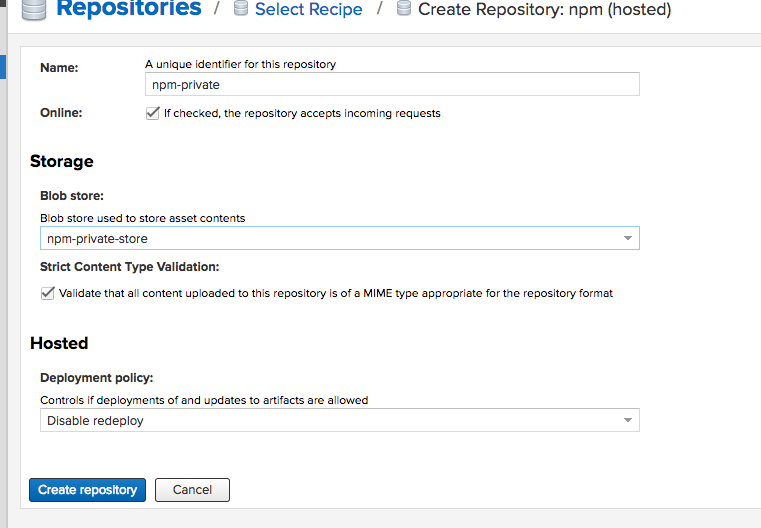
创建 npm (group) 仓库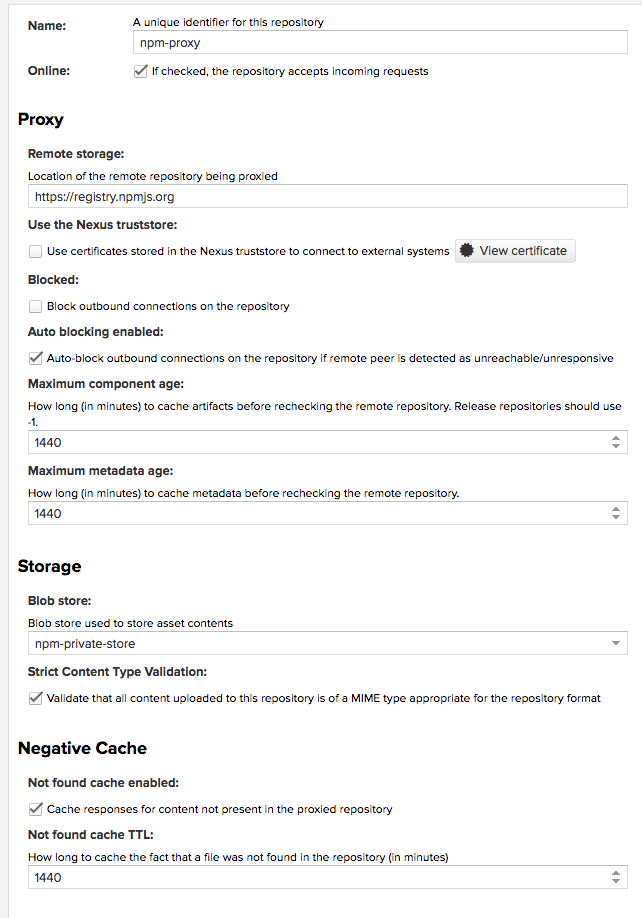
组件库采用的技术方案
技术方案,改技术能很好的开发组件打包,发布组件,编写文档。项目也采用 TypeScript 来开发,主要是因为这样让后期开发人员能很好的使用。(package.json 中 peerDependencies 是不会被打包进去的),其它的配置信息可以去看 father 的文档。
开发流程
3.1 开发组件
在 src 的目录下面新建要开发的组件,文件名字采用的是驼峰的方式(首字母小写)。可参考写过的组件,接下来就是你自己自由的发挥了。3.2 组件说明
就是你要写怎么使用这个组件,让组内的人员知道怎么使用。在文件夹下面新建 index.mdx(文件后缀名不要写错了)。这里简单的说明一下
|
|
- 3.3 在线文件查看
npm start, Open your browser and visit http://127.0.0.1:8001 , see more at Development,就是一个组件库的介绍网页。
发布组件
发布到 npm 的私服,在项目目录下新建.yarnrc
|
|
在 package.json 中设置
|
|
4.1 进行登录,要求输入用户名和密码,就是 nexus 的密码,可以新建多个用户。
1yarn login --registry http://192.168.3.19:8081/repository/npm-private/4.2 发布到私服。
1yarn pub --registry http://192.168.3.19:8081/repository/npm-private/
如何使用组件
在你使用的项目中新建如果你用 npm 就是.npmrc,如果是 yarn 就是.yarnrc 文件内容分别为
.npmrc 文件
|
|
.yarnrc 文件
|
|
使用 npm login 和 yarn login 登录私服(用户名和密码就是上文说到的 npm 私服)
然后就可以使用也可以使用 yarn
|
|
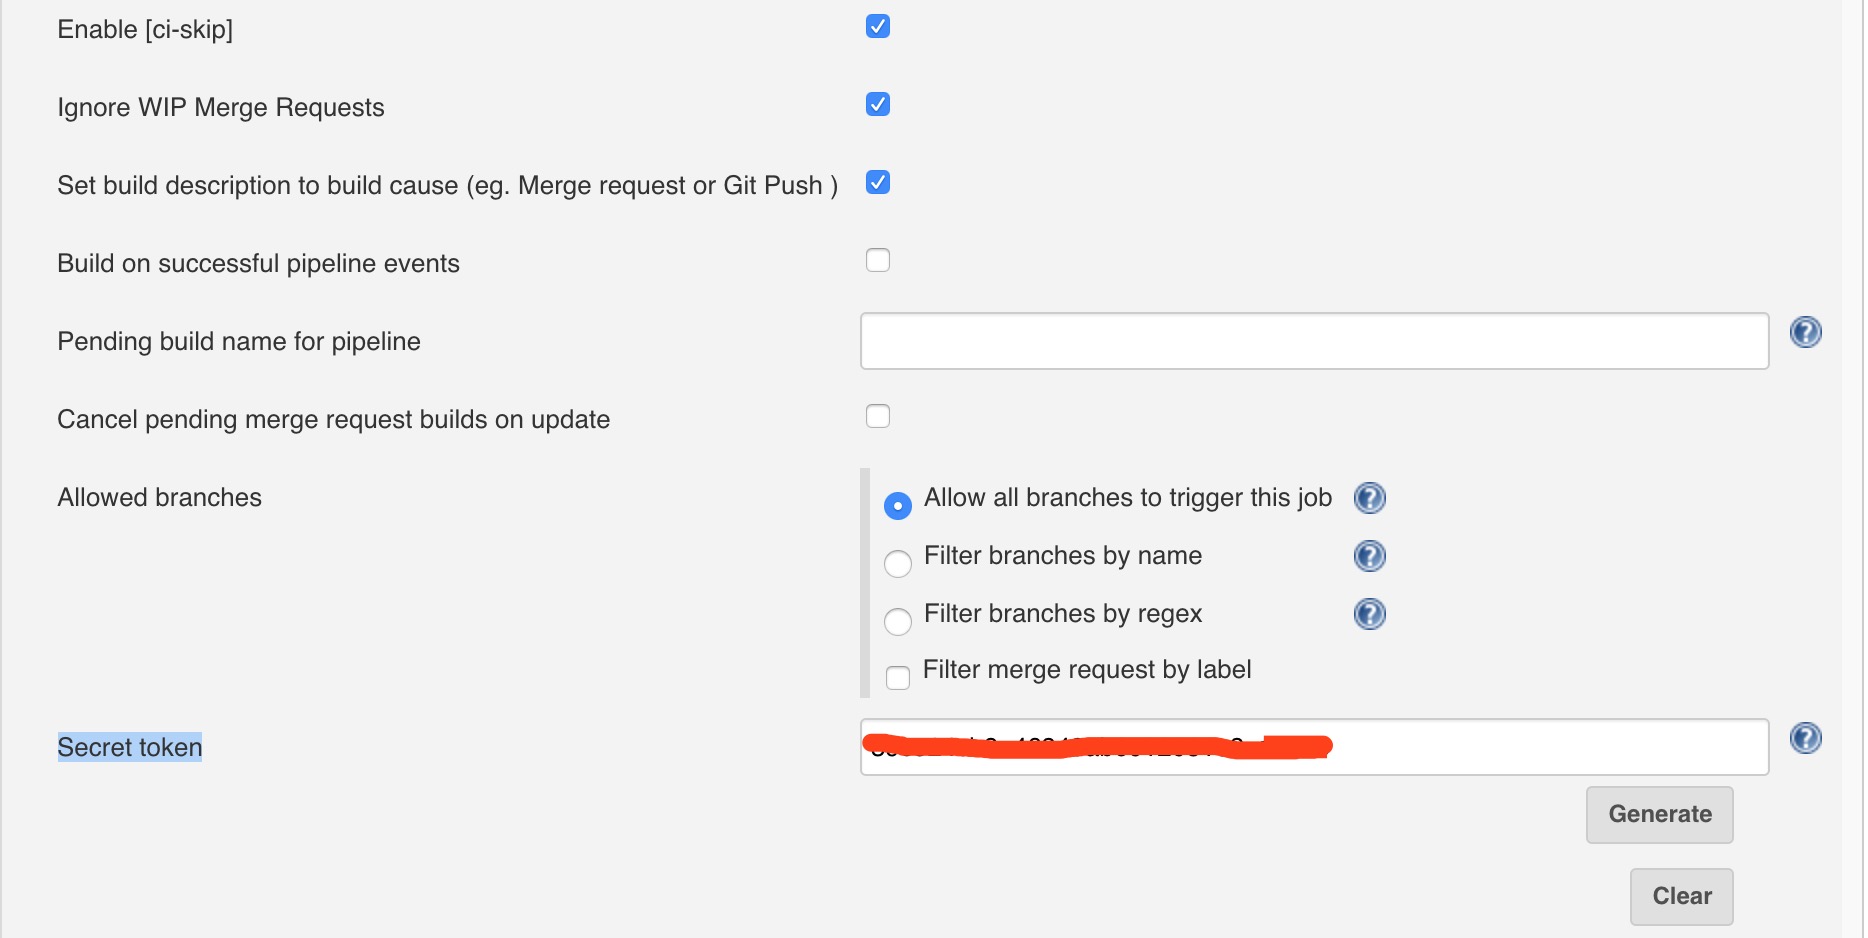
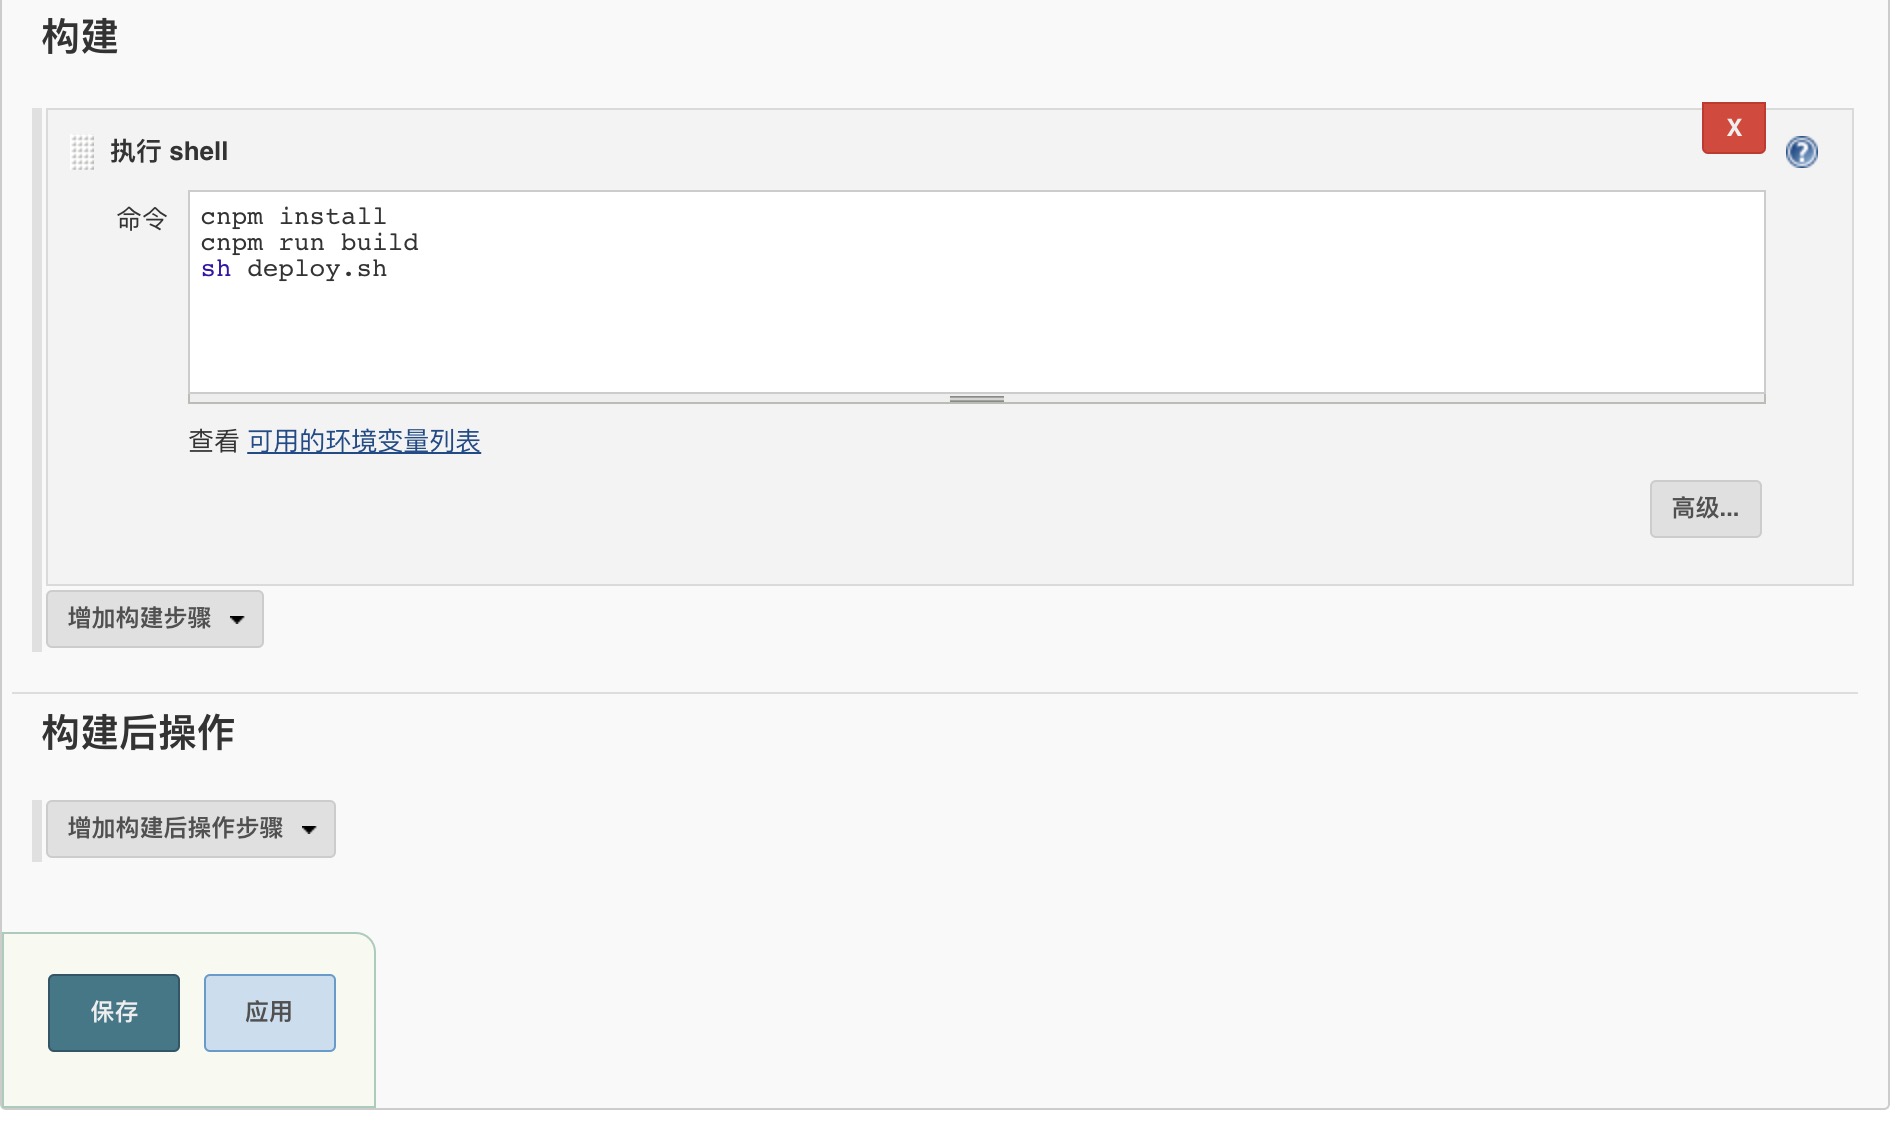
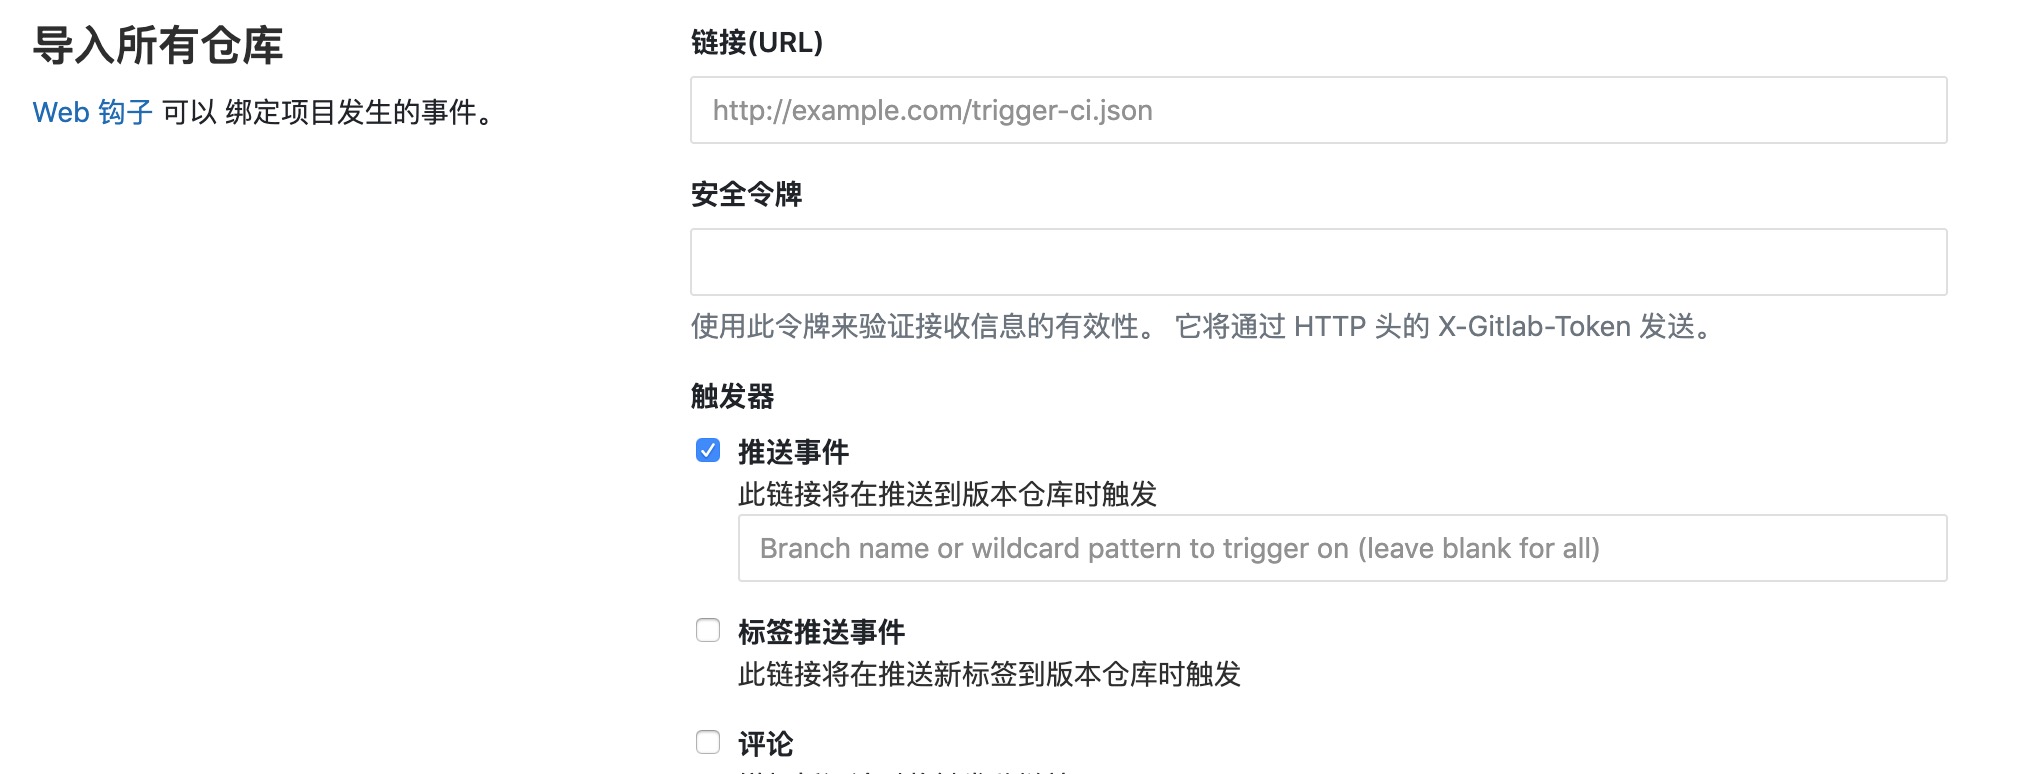
配合之前的 jenkins
配合 jenkins,写入一些脚本,实现代码上传之后,自动打包发布组件库和使用文档。


 ,
,